1 min read

Myodetox

Posted on

4 Moves Every Cyclist Needs


Whether it be on the road, dirt, snow or track, we demand a lot from our bikes, but how do we demand more from our bodies? These cyclist exercises will help you ride faster, longer, and more comfortable on any bike for those epic days in the saddle.
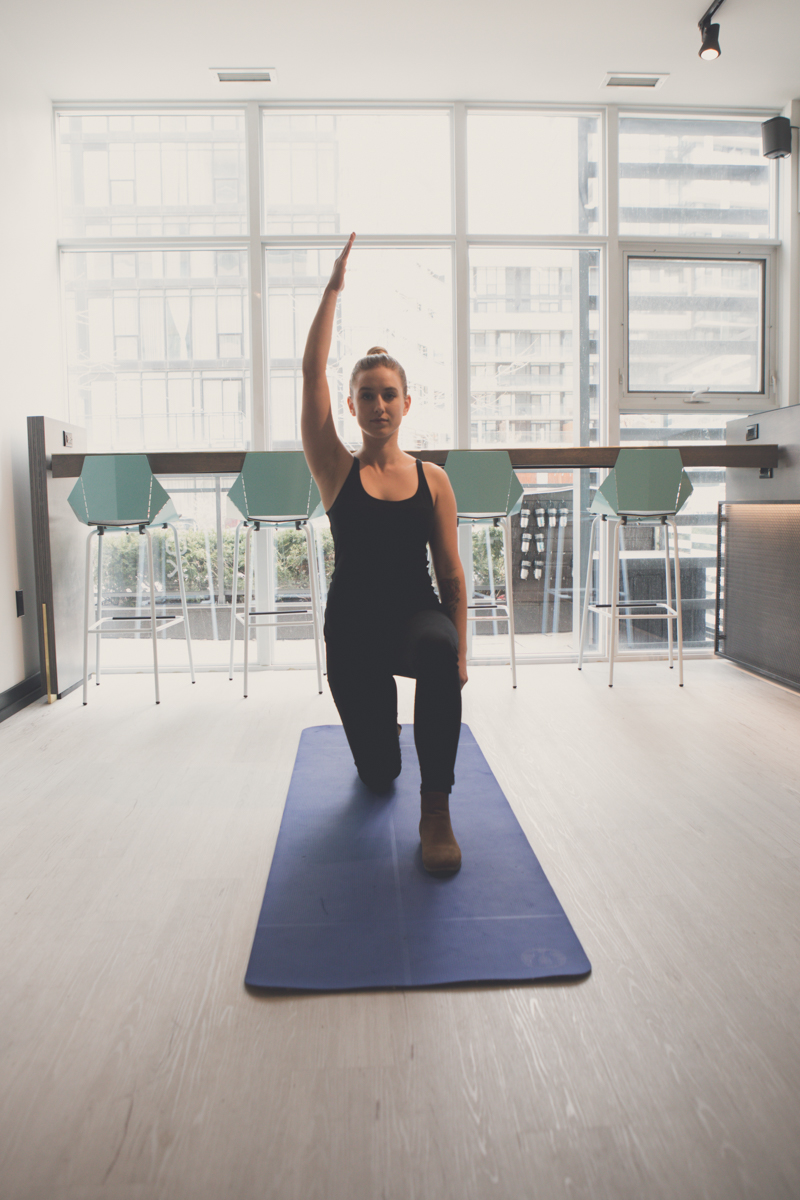
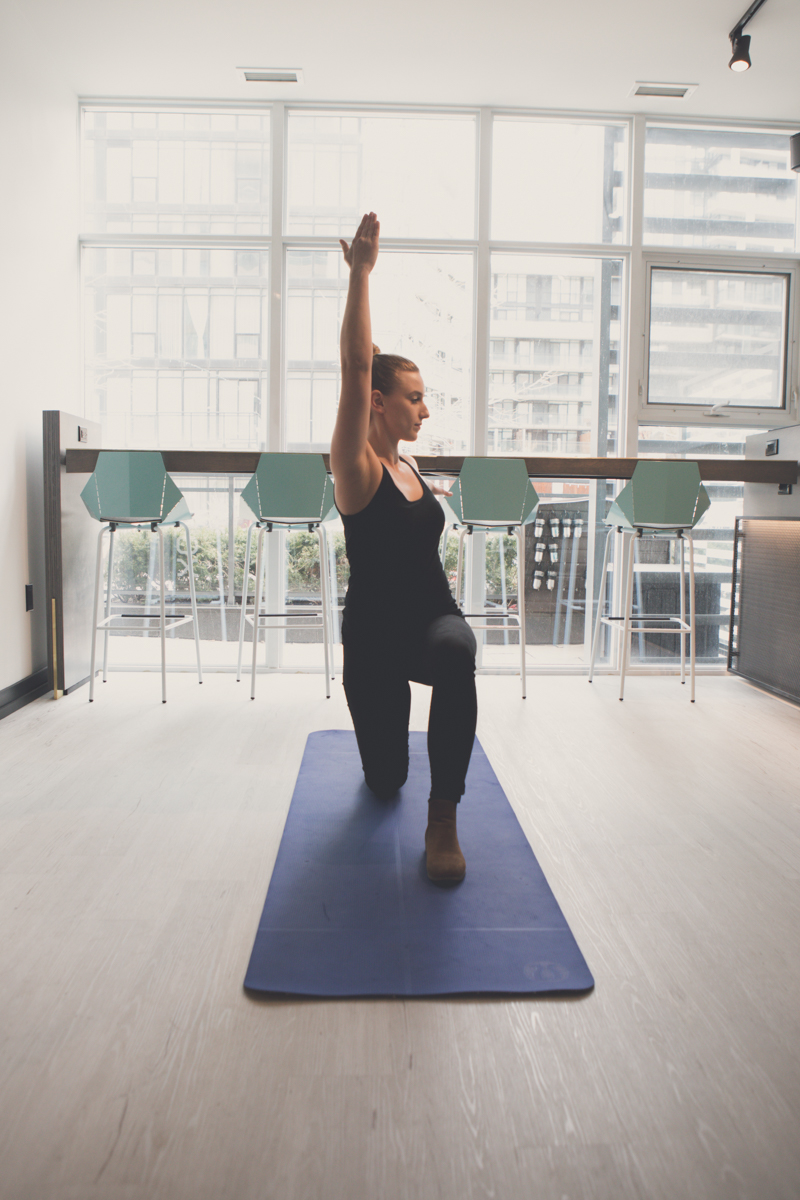
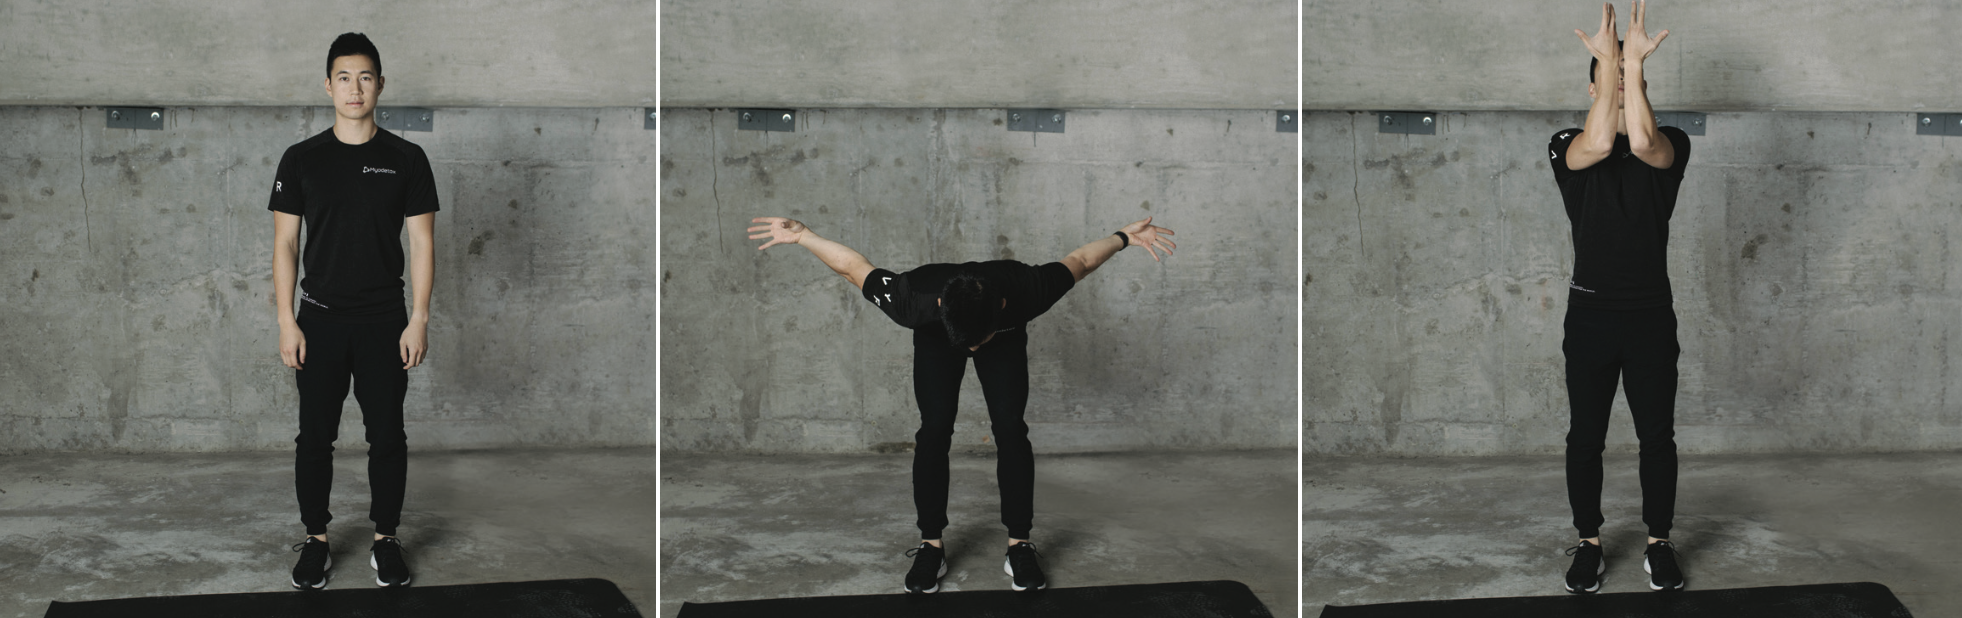


1. Aero Tuck ||
10 reps
Step 1: Start with feet hip width apart.

Step 2: Squat down. Bend your trunk forwards, bring your arms away from your sides. Reach back behind you while straightening your elbows and rotating your thumbs down and back.

Step 3: Stand up and bring your elbows in front of your face while reaching upwards with palms facing you. Look up.
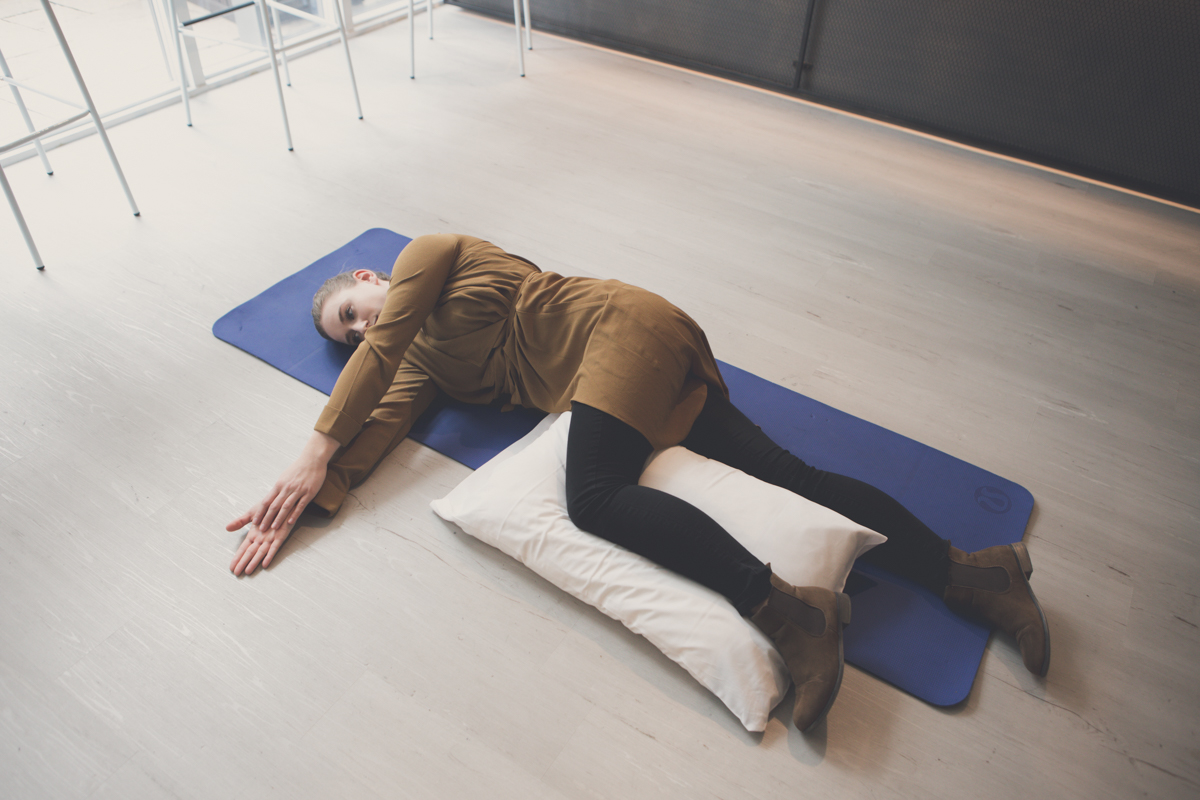
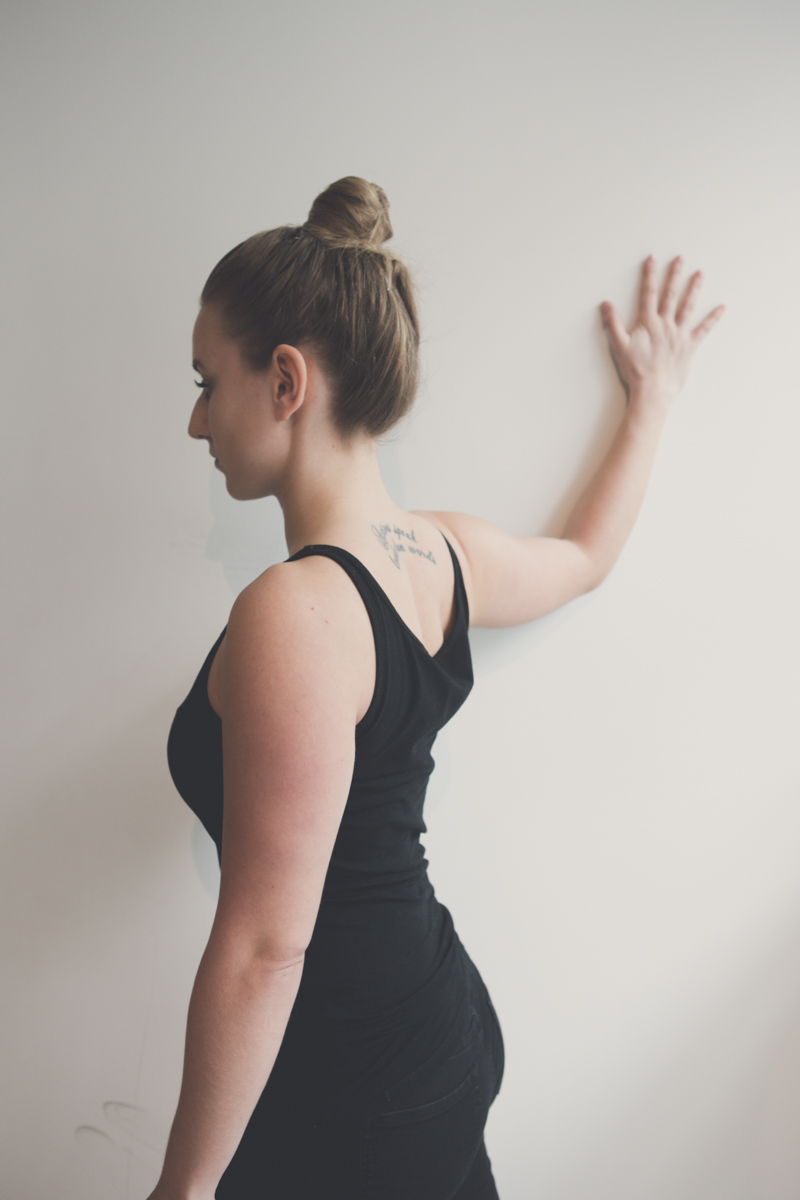
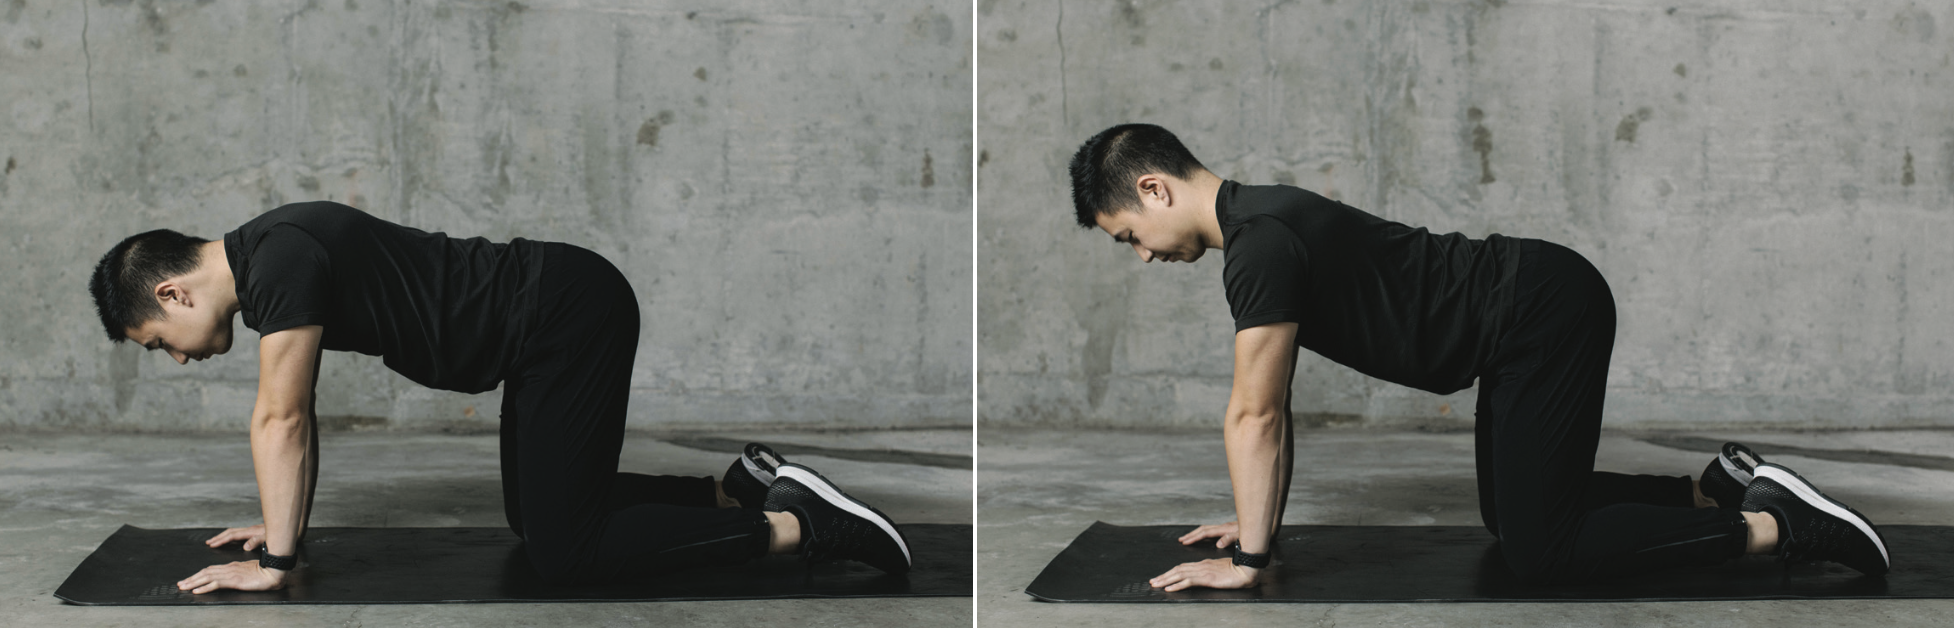


2. Neck Opener
15 reps
Step 1: With the shoulders over wrists, hips over knees, gently push the chest away from the floor. Focus your sights on a target on the floor between your hands. Dip your chin down towards the floor, moving only your neck. Hold for 3 seconds.

Step 2: Reverse the movement by tucking in your chin fully. Hold for 3 seconds.

cyclist moves


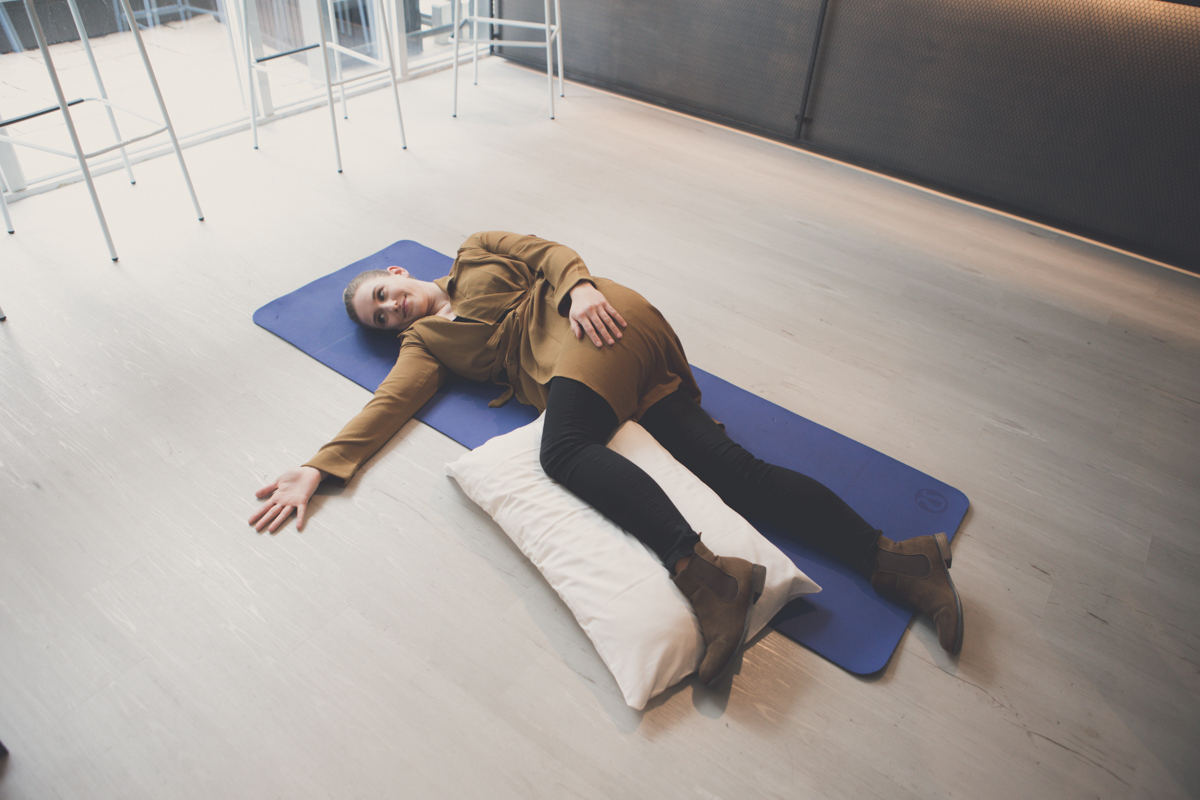
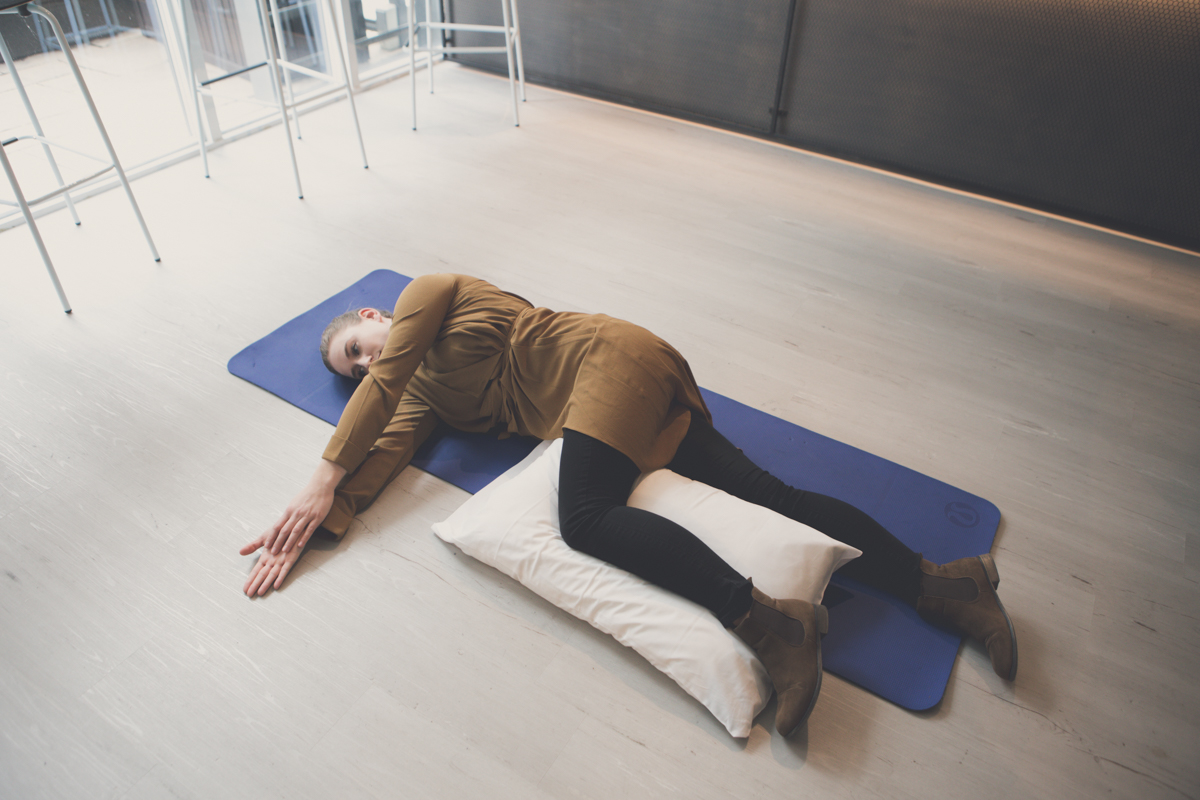
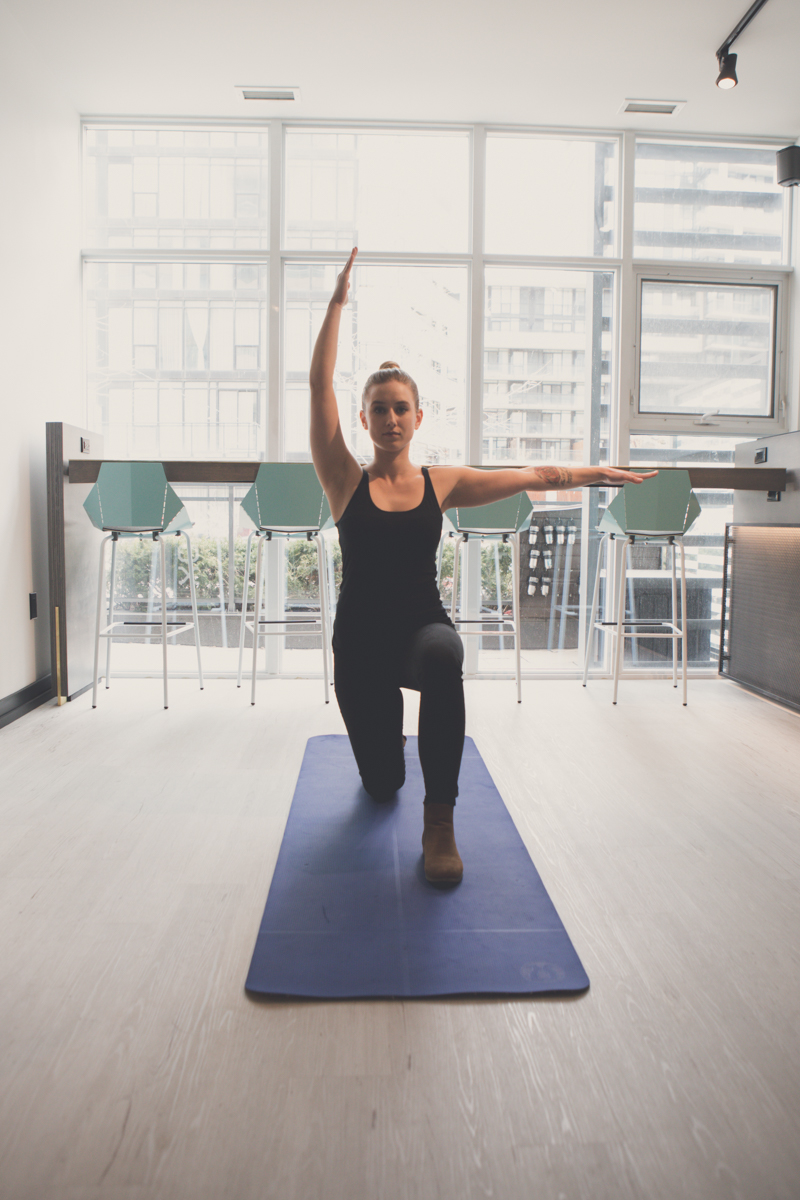
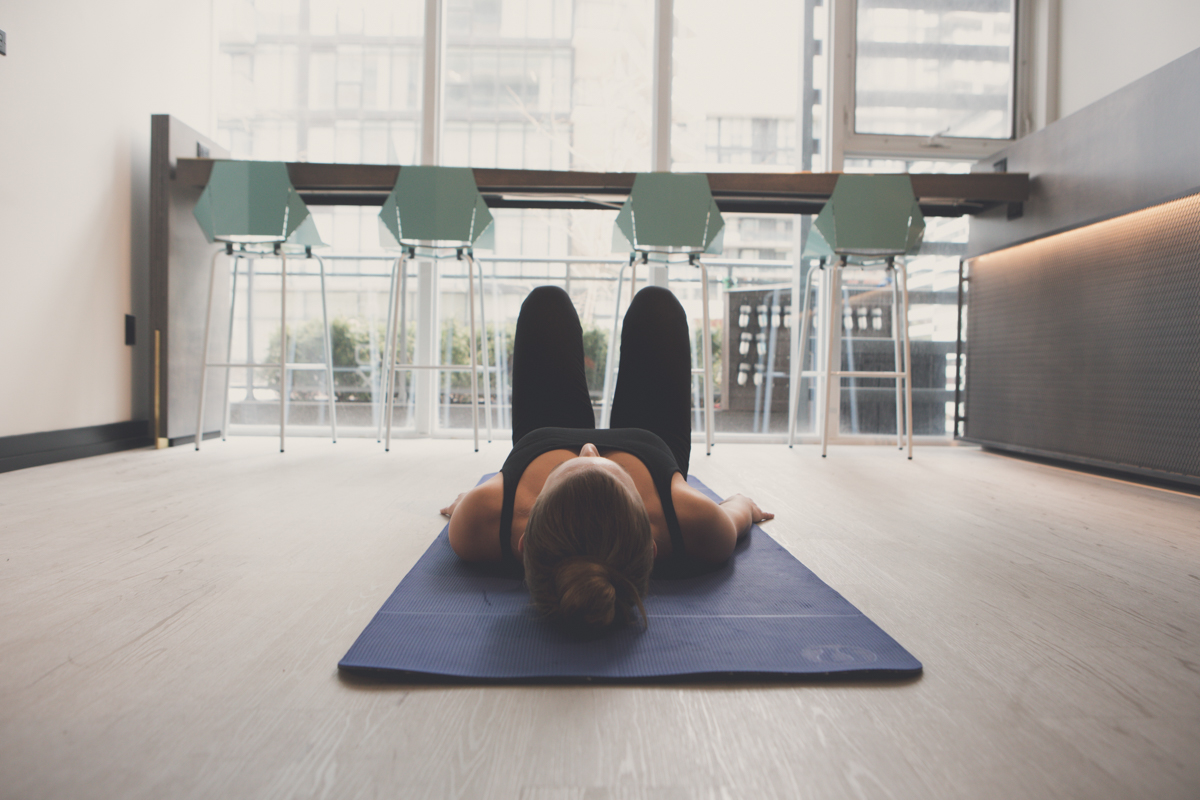
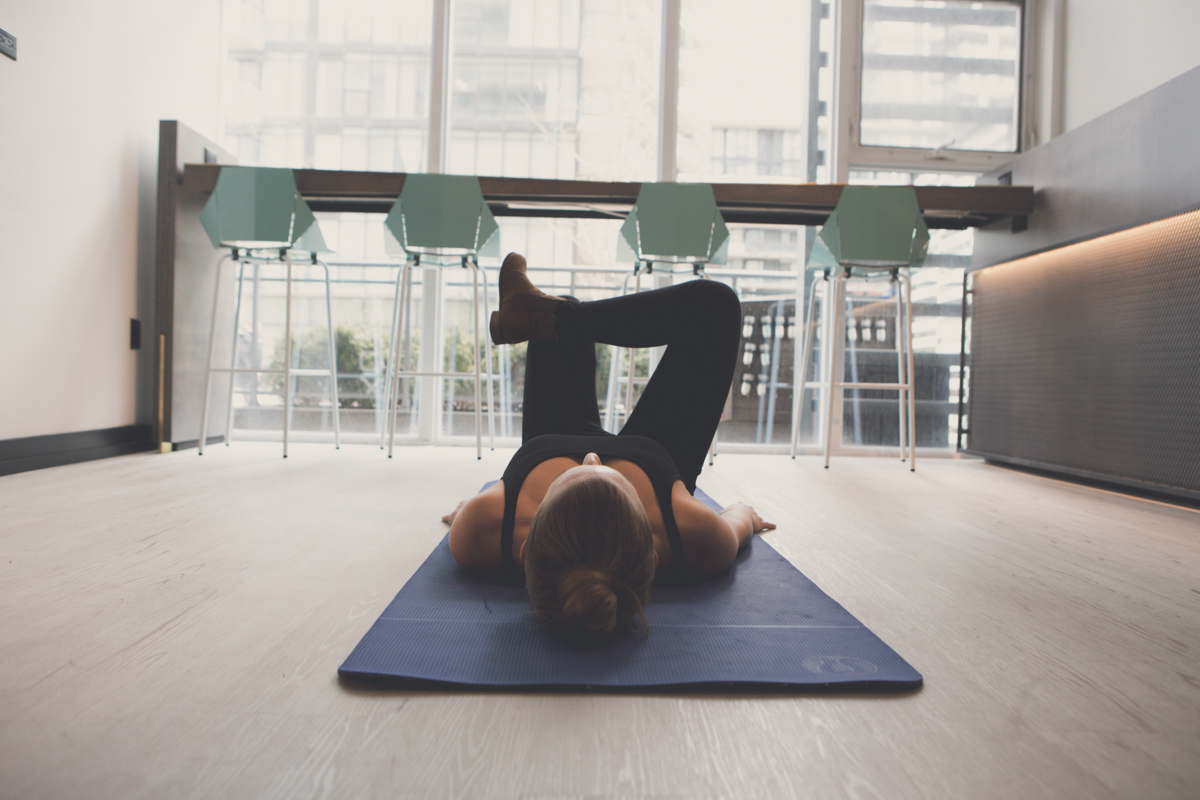
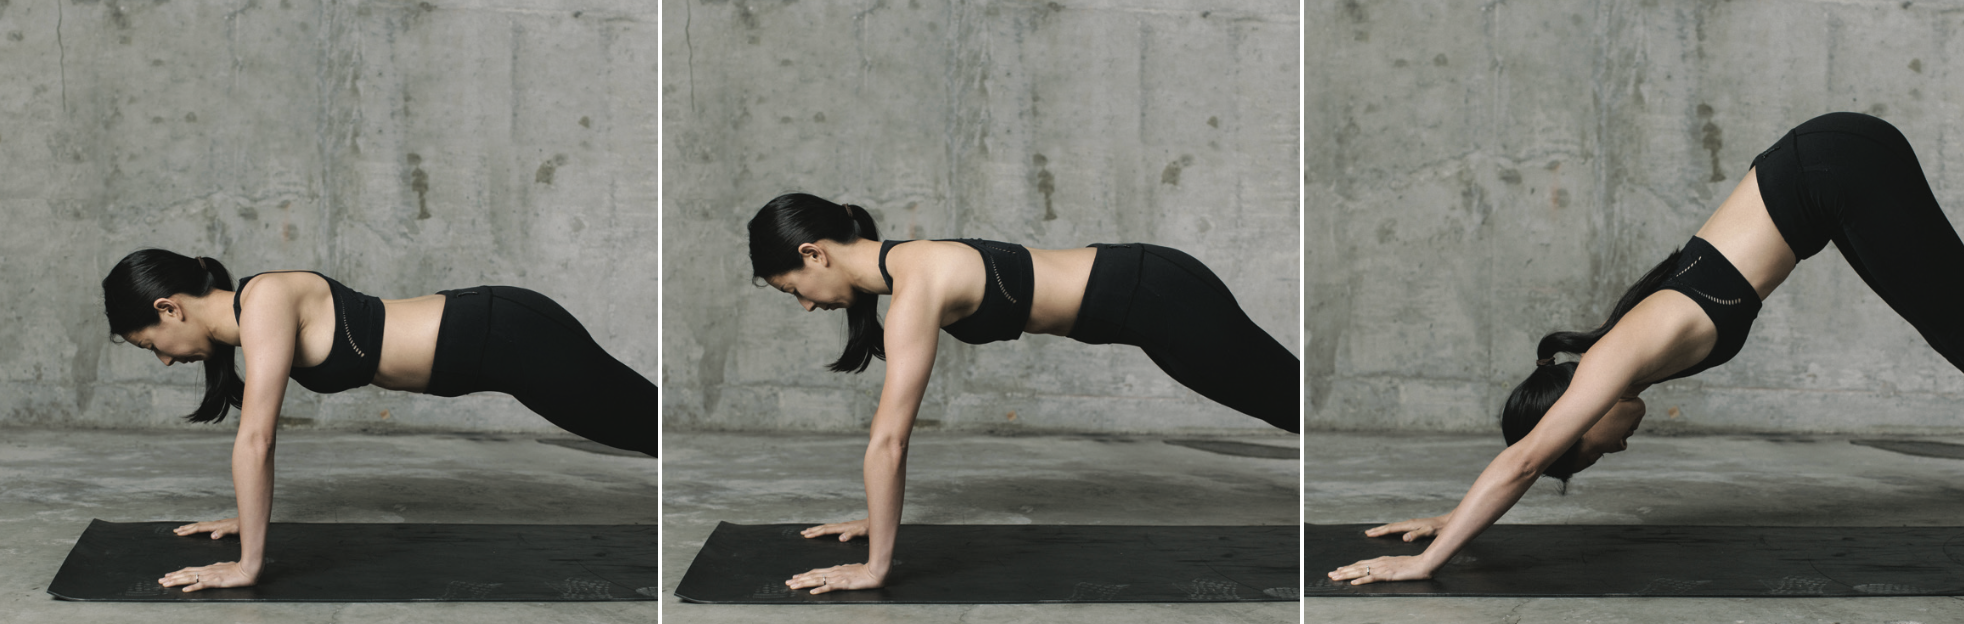
3. Shoulder + Backline Opener
10 reps
Step 1: Start in a push up position with shoulders over wrists and legs fully extended. Drop your chest down towards the ground, squeeze your shoulder blades together. Elbows stay straight. Hold for 5 seconds.

Step 2: Push your chest away from the ground, round your shoulders forwards. Elbows stay straight. Hold for 5 seconds.

Step 3: Keeping knees relatively straight, hinge through the hips and form an inverted V shape, finishing with your eyes looking past your feet. Drop back to start position.
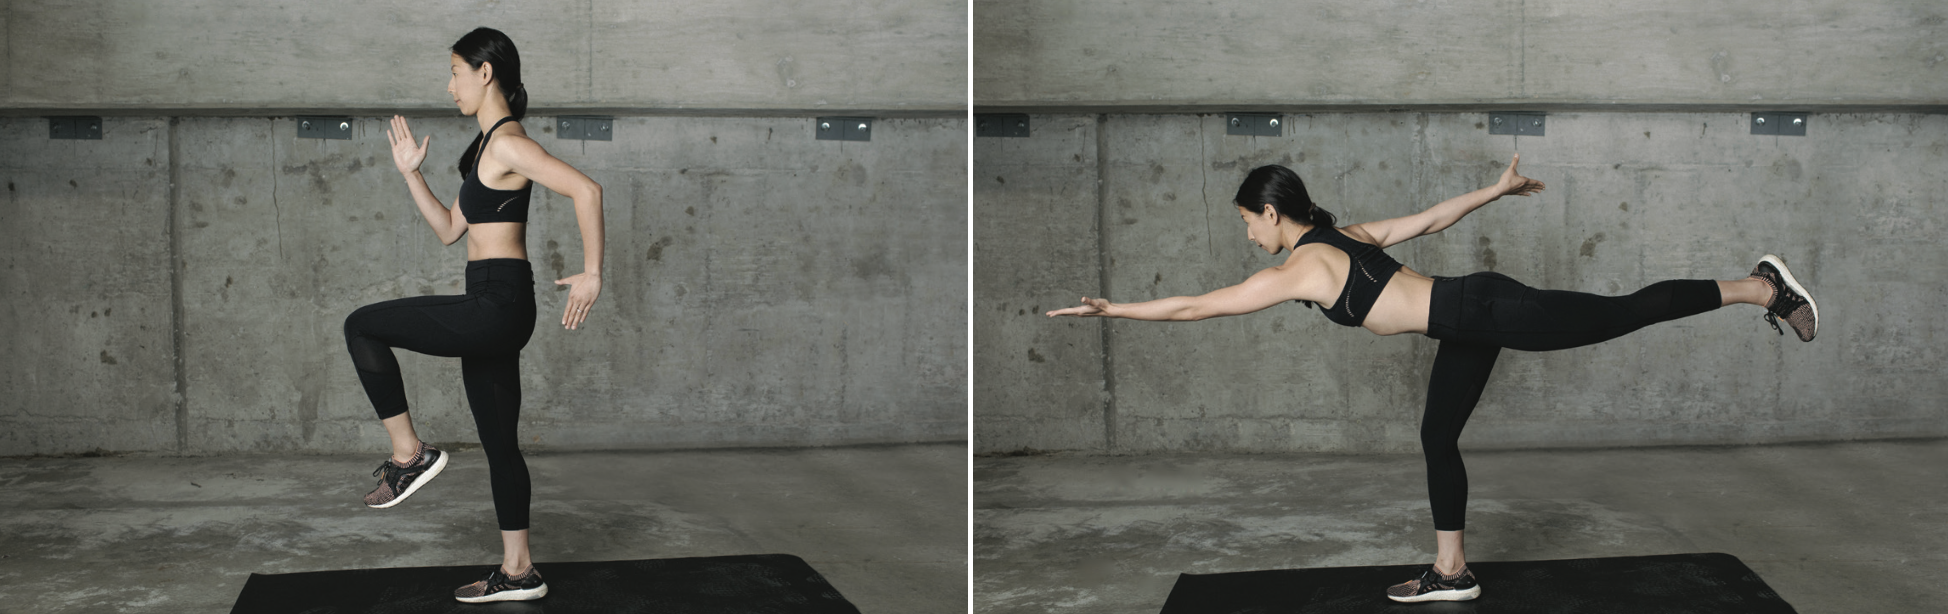
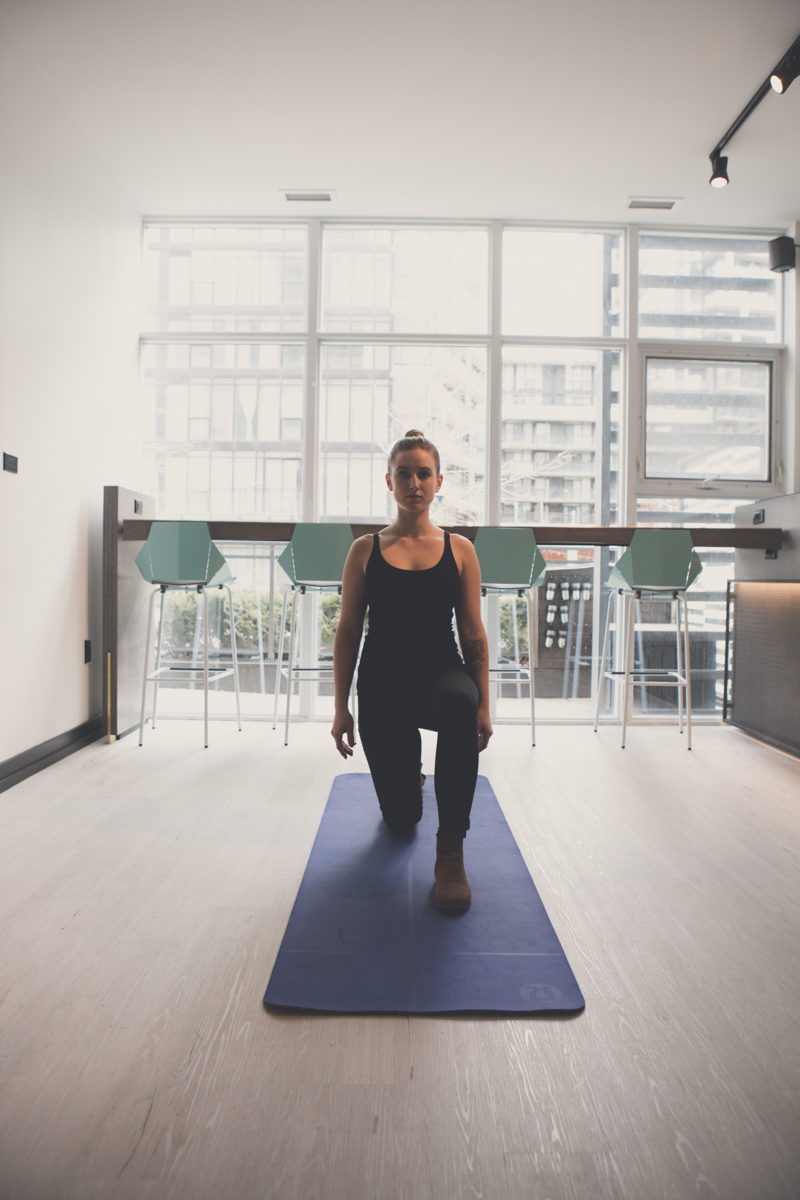
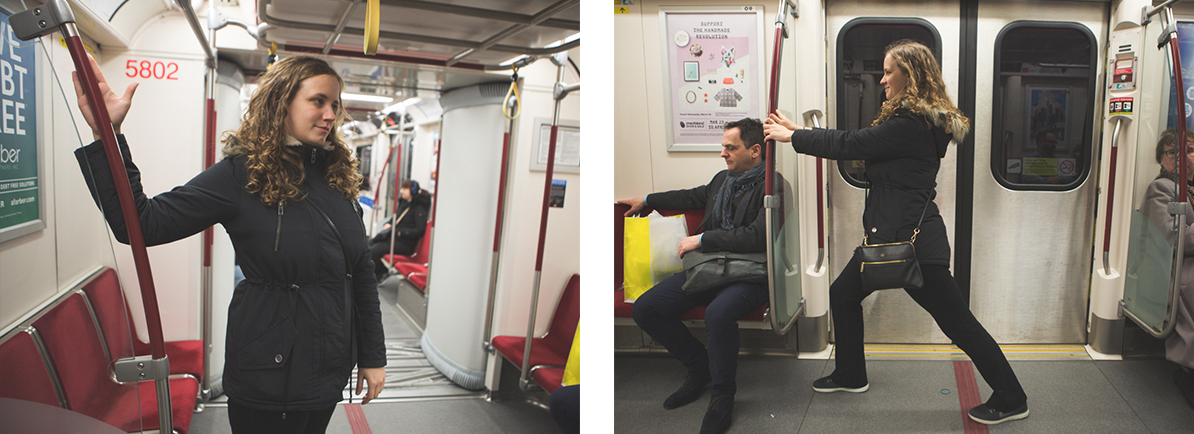
moves for cyclists


5. Diver
10 reps
Step 1: Stand with toes pointed forwards. Drive left knee up while keeping knee bent. Drive right arm forwards left arm back with elbows at 90 degrees.

Step 2: Keep your left foot off the ground as you extend your left leg backwards. Lean your trunk forwards. Drive your left arm forwards with palm facing up and right arm back with thumb rotating down and back.

cyclist rehab


Want to take your cycling to the next level?
Join us for a session! Our expert physical therapists and chiropractors will optimize your movements, reduce pain and increase your longevity. They’ll create an individual plan that will include cyclist exercises like these!

Find your nearest clinic


2 min read

Myodetox

Posted on

5 Exercises For Moms


Written by Dr Natalie Lopez and Jasmine Choi


‘Strong like a mother’ really is true when you take into account all the changes a mother goes through during pregnancy and all they do while healing in that early postpartum period.


These 5 exercises for moms are to help you or a mother in your life reconnect with their body after having a child. They will help to retrain core and back muscles after childbirth; whether that was recently or years ago.

It is never too late to help retrain these muscles and get them to help you rather than hinder you from doing what you love!


1. Inner Core Breath
3 sets of 10 breaths
Start by laying on the ground with your knees bent and feet flat on the floor. As you inhale, relax your pelvic floor (imaging dropping a marble from your pelvic floor, or passing gas sensation), while allowing your belly to fill with air. Follow with an exhale as you engage your pelvic floor (lifting a marble with your pelvic floor, or stopping the flow of urine). Make sure to fully relax your pelvic floor in between reps.

mom breathework


2. Core Heel Taps
3 sets of 10 taps/side
Lie on the ground with your back flattened against the ground, no arch between your low back and mat. Start with both of your knees bent, with your feet hovering in a tabletop position. Slowly alternate tapping your feet to the ground, lowering each foot with control. Exhale and engage your core as you lower your foot, and inhale to bring it back up to tabletop.

mom exercises


3. Banded Rows
3 sets of 10 reps
Secure a resistance band to a sturdy object in front of you. Pull the band back with both hands, elbows driving back behind you. Lead the motion by squeezing your shoulder blades down and back. Hold at end range for 5 seconds. Keep your shoulders away from your ears.

exercises for mom


4. Modified Childs Pose with Upper Back Rotation
2 sets of 10 reps per side
Begin in a tabletop position with your hands below your shoulders and your knees under your hips. Spread your knees out to the side of your mat while keeping your feet close together. Move your hips back until your belly is touching your thighs and your forearms are resting on the ground. From here, put one hand behind your head (while the other remains on the ground) and rotate your mid-back, and neck upwards. Return to centre and repeat on the other side.


5. Kneeling Squat With Band Pull-a-parts
3 sets of 10 reps
Start by holding a theraband with your arms out in front of you, in a kneeling position. Exhale (lifting and engaging your pelvic floor) as you rise up into a high kneeling position while pulling the band apart into a ‘T’ position. Inhale (relaxing your pelvic floor) as you return to the starting position.

mom exercise routine


Interested in Pelvic Floor Physiotherapy?
These exercises for moms came from our expert pelvic floor physiotherapy team. Book your session with them today! They will assess your movements and body to set you up on a plan to increase your mobility, reduce pain, and prevent injury.

Jasmine Choi
is a level 3 pelvic health certified therapist and she specializes in helping women in both the pre and postpartum periods, along with many other pelvic health issues.

View her available sessions

Dr. Natalie Lopez
is a GrowCo and acupuncture certified therapist specializing in pre and postpartum care and pediatric care.

View her available sessions

2 min read

Myodetox

Posted on

How to Treat a Pinched Nerve in Your Neck


Cervical Radiculopathy Explained


Have you ever had numbness or tingling going down your arms or fingers? You may have experienced cervical radiculopathy, also known as nerve compression or a pinched nerve in your neck. This unassuming injury occurs in nearly 2 out of 1000 people.


What Is A Cervical Radiculopathy?
Cervical radiculopathies are the result of compression and inflammation of a nerve at the neck. There are various conditions that may lead to nerve compression:

  • Degenerative disc disease of the neck (spondylosis)
  • Disc herniation at the neck
  • Osteophytes of the neck
  • Stenosis at the cervical spine
  • Muscle tightness at the neck


    Who Gets Nerve Compression?
    The population most at risk for developing pinched nerves is the 50+ age. Women are more at risk than men, though the difference is mild.


    Symptoms Of A Pinched Nerve In Your Neck
    The nerves from the neck connect to your trunk, shoulder, arm, hand, and fingers. Symptoms of nerve compression can radiate to any one of those regions:

  • Numbness
  • Tingling e.g. “pins and needles”
  • Muscle weakness
  • Reduce reflexes (tested by your healthcare professional)
  • Pain

    Radicular symptoms like pain and nerve sensations are often felt down the arm. Moving the neck becomes incredibly painful. Performing certain movements may change your symptoms – for better or worse.

    Many cases will present with reduced reflexes and muscle weakness. The most common region affected is the C7 nerve root, the C6 nerve root, and the C5 nerve root. Common movements affected by a pinched nerve in your neck are pushing, pulling, and gripping.

    Cervical radiculopathies typically occur on one side of the body. If you’re noticing nerve symptoms down both sides, see your physician immediately.


    How Do You Treat It?
    Treatment of cervical radiculopathy will involve your physician and physical therapist.
    Your physician can perform tests to identify the cause of your nerve compression. Your physician and physical therapist can perform tests to determine the extent of the compression and provide treatment options such as:

    Postural training: nerve compression may be aggravated by a forward head posture. This requires postural awareness, education, and exercises.

    Exercise: strength training of the muscle can dramatically improve symptoms.
    Check out our IG posts dedicated to neck strengthening.

    Manual therapy: traction, myofascial techniques, and joint mobilizations dedicated to improving posture and reducing muscle tension can provide relief.
    Check out this post about manual therapy for the neck.

    Immobilization: temporarily providing a soft collar to reduce nerve symptoms. Be aware, there is minimal evidence supporting this.

    Medication: provided under the guidance of a physician.

    Surgery: when conservative management fails, and serious nerve symptoms are present.

    There is good news for those with a pinched nerve. Your symptoms will nearly fully resolve in 4-6 months. Up to 90% of people with nerve compression maintain recovery for 4 years. This shows that degenerative changes in the neck do not lead to permanent nerve damage.


    Worried You May Have A Pinched Nerve?
    Give us and your physician a call. We’ll book you a session with one of our expert therapists. They’ll assess your movements and set you up on a FutureProof plan.

    Find your nearest clinic

  • 3 min read

    What Is Whiplash?

    Posted on

    What Is Whiplash?

    Most people only associate whiplash with car accidents, but in reality, you can get whiplash from contact sports, rollercoasters, and even whipping your hair back and forth too abruptly at a concert.

    What Is Whiplash?

    So how does a whiplash injury happen? Whiplash is caused by a quick and sudden hyper-extension (backward) and then hyper-flexion (forward) movement of the neck. This type of abrupt movement causes the soft tissues (muscles, tendons and ligaments) in your neck to be stretched past their normal limits and therefore, causing injury to those tissues – known as a Whiplash Associated Disorder (WAD).

    Whiplash can be classified into a grading system:
    WAD I: Neck pain with stiffness or tenderness only. No physical signs.
    WAD II: Neck pain and musculoskeletal signs such as a decrease in range of motion.
    WAD III: Neck pain and neurological signs. Such things could include associated sensory deficits (numbness or tingling), weakness, decreased or absent deep tendon reflexes.
    WAD IV: Neck pain and fracture or dislocation of the vertebrae of the neck.

    The most common grade of a whiplash injury is a WAD II.

    Common Whiplash Symptoms And Signs

    It can be difficult to tell which grade of WAD you may have. You might even question whether you have whiplash or something else! Dizziness, headaches, jaw pain, and vertigo are some signs that you are experiencing whiplash.

    How Long Does Whiplash Last?

    It is difficult to provide an exact duration of how long whiplash symptoms will last, as it varies greatly from person to person. Typically, people recover within 6 months, however, some may have prolonged symptoms and it may take years to fully recover. But don’t let stop you from carrying on with your daily activities like:

    Taking the perfect selfie angle
    ralph

    Afternoon meet-up with a friend
    ralph

    The length of healing time depends on a variety of factors such as, severity of the injury, how soon you initiate treatment, compliance to treatment, any prior whiplash injuries, any presentation of neurological deficits, any associated fractures or dislocations and any pre-existing health conditions that may delay full recovery.

    How Do You Treat A Whiplash Injury?

    The initial treatment option for a whiplash injury is to rest and apply ice or heat to the neck and surrounding area using the 10-10-10 protocol. Not sure what the 10-10-10 protocol is? We got you!

    10-10-10 Protocol
    ralph
    ralph

    1. Apply ice/heat to the area for 10 minutes
    2. Remove ice/heat for 10 minutes
    3. Reapply for another 10 minutes
    4. Repeat.

    Manual therapy and exercises provided by a chiropractor, physiotherapist or registered massage therapist will help to restore the proper range of motion in your joints, ease muscle spasms and decrease pain. This will enable functional restoration and help you return to your normal daily activities sooner.

    Delayed onset of treatment may lead to a poorer prognosis and hinder the total recovery time. In other words, the sooner you begin treatment, the better!

    6 min read

    Top 5 Muscle Pain Relief Stretches You Can Do Anywhere

    Posted on

    Top 5 Muscle Pain Relief Stretches You Can Do Anywhere

    Many people think of stretching and immediately associate it with pre or post-workout, but what about adding in some muscle pain relief stretches during your work day?

    We are spending a considerable amount of time (approximately 8 hours) seated at our desk during the day, or looking down on our phones or tablets. Surely, we should take some time to think about muscle pain relief. Overtime our bodies will no longer want to deal with the strain caused by static posture. The most common types of pain we experience are neck tension, stiff shoulders, hip and back pain.

    We take you through five effective active stretches for your whole body, resulting in increased mobility and muscle pain relief.

    ralph

    ralph

    ralph

    Neck Stretch: Hold for 10 seconds, 3x/side

    1. Bend your head to the right.
    2. Lower and press down your left shoulder
    3. Reach forward with your left arm, just below shoulder level.

    This is a great neck stretch for overall neck tension and muscle pain relief since it stretches out the upper trapezius muscle, while simultaneously promoting activity of the serratus anterior muscle. Both of these muscles work together to create healthy shoulder movement.

    ralph

    ralph

    ralph

    ralph

    Thoracic Spine Rotations: Complete 5x/side

    1. Lay on your right side, with your right leg extended and your left knee bent at 90 degrees, propped up with either a foam roller or pillow, to lock out your lumbar spine.
    2. Outstretch your right arm to shoulder level with your palm facing up, and place your left arm directly on top.
    3. Slowly start lifting your left arm up, mimicking the motion of an archer, rotating segmentally up the spine to evenly distribute the motion.
    4. When the back of your left arm reaches the ground on the opposite side of your body, slowly rotate back to the starting position.

    This stretch is great for thoracic spine relief. To increase extension and rotation within our thoracic spine. This will also offload the lumbar spine, decreasing back tension.

    ralph

    ralph
    ralph
    ralph

    Hip Flexor Stretch (iliopsoas muscle release): Complete 5x/side

    1. Start in a kneeling position, with your left leg forward, and your right knee bent behind you.
    2. Tuck your pelvis under and squeeze your right glute.
    3. Reach your right arm up and overhead to the left.
    4. Lift your left arm up to shoulder level and rotate to the left.

    This hip flexor stretch helps to offset prolonged sitting by stretching out your anterior hip flexors, especially the psoas, which can pull you into an anterior pelvic tilt.


    ralph

    Pectoralis Wall Stretch: Hold for 30 seconds/side

    1. Find a doorway or the edge of a wall, and place your left arm against it, with your elbow bent and your arm overhead.
    2. Sink forward into the stretch.

    Stretching out the pectoralis muscle will correct your slouched posture and restore normal shoulder motion.

    ralph

    ralph
    ralph

    Hip External Rotator Stretch: Hold for 1 minute/side

    1. Lay on your back with your knees bent and both feet flat on the floor.
    2. Place your left heel on your right thigh, just above the knee.
    3. Lift your right foot off the ground, and hug your right thigh into your chest.
    4. To intensify the stretch, use your left elbow to push your left knee down and roll your body slightly to the right.

    This is an effective stretch to increase hip mobility and reduce sacroiliac joint pain.

    These stretches focus on the major muscle groups that usually contribute to neck and low back pain and stiffness. They are super simple and easy to do virtually anywhere! Something as little as spending a few minutes stretching is all you need for muscle pain relief.  Small sacrifices daily will help the longevity of your body.

    3 min read

    Five Commute Exercises To Do For Neck Pain and Lower Back Pain

    Posted on

    Five Commute Exercises To Do For Neck Pain and Lower Back Pain

    Typical activities while commuting, like staring at your phone or reading, also increases neck tension.

    Your commute, plus sitting at work, is a lot of time that your lower back is inactive; therefore, causing lower back pain. “If you don’t use it, you lose it”. While we may not be able to do anything about the commutes (aside from relocating closer to our workplaces), we can optimize our time commuting to ensure your body won’t feel the after effects of logging countless hours on the bus or train.

    ralph

    Get on/off your stop earlier

    Depending on what your job is, you may already be spending most of your day sitting at a desk. Why not change up your routine and get on or off at a farther stop. Walking a few extra blocks will help activate your glutes which can contribute to decreasing lower back pain. Walking will also allow you to spend a bit more time each day in an extension position which will counteract all the hours spent in flexion at work. It’s also an excellent opportunity to destress from the day and reflect on things you may need to get done at home.

    ralph

    Practice your balance while riding public transit

    This one is almost forced some days when the bus, streetcars or subways are full to the brim and there are no handrails to hold. But granted you are relatively stable as is (i.e. no severe balance issues), use this time to practice your balance by standing with no handrail support. The movement of the vehicle will provide external perturbation which will challenge your proprioception. Safety tip: it’s recommended to do this near a handrail in the event a significant bump, or sharp turn unexpectedly happens.

    ralph

    Use the handrails for stretching

    As mentioned, many of us spend a significant portion of our days in a flexed forward posture. This positioning has many adverse effects on our bodies,neck pain being a main culprit. Why not use your commutes to help you stretch out these tight structures? Use the handrails to get in a pec stretch or use two and stretch out those hip flexors. Anyone staring is just jealous they never thought of it.

    ralph

    If you MUST sit, actively sit
    Unless your commute is more than an hour, do your best to stand for most of it. This is especially true for those of us who will be sitting the rest of the day. However, if you need to sit, make sure to sit actively. When sitting, don’t slouch, don’t sit at the front of the seat and lean back and don’t lean excessively to the side. Instead, sit back in your seat, use the backrest for lumbar spine support and engage your core. For added benefit, perform seated cat/camels to keep your spine moving.


    ralph

    Read or listen to podcasts while avoiding forward head posture

    Using the dreaded commute for your personal gain can actually cause you to enjoy your time spent on public transit. However, with the crowded buses, streetcars, and subways, taking out your laptop may not be feasible. Try downloading some motivational podcasts or books that will help you to prepare for your day or week.

    When reading, make sure to keep your posture in mind. Keep your elbows close to your sides and use them to prop your book up to eye level to avoid excessive neck flexion and forward head posture. When you’re finished, do a quick stretch for the front of your neck by extending, rotating and side bending until you feel a gentle stretch. Follow up with some chin tucks and you’ll be ready to start or finish your day right.

    2 min read

    Four Text Neck Exercises To Avoid Text Neck Syndrome

    Posted on

    Four Text Neck Exercises To Avoid Text Neck Syndrome

    At this point in the tech generation, it’s safe to say that majority of the population has a smartphone. Unfortunately, we all are susceptible to text neck syndrome. However, small changes to the way you consume content on your phone can make all the difference between a healthy neck and text neck.

    Check out these four simple exercises and neck pain stretches for your neck pain!

    ralph

    1. Neck problems from cell phones can be fixed by simply bringing your phone a little closer to your face. It makes the world of a difference!

    Ultimately, you decide on positioning; your phone doesn’t. By putting 10 degrees of extension in your neck (bringing your head back up) can alleviate about 10lbs of sustained weight on your neck. As long as you’re more conscious about positioning, it’ll help you find opportunities to bring your phone up to your face.

    ralph

    2. Talk more and text less

    We have lost our ability to make more genuine connections. We don’t even call to wish each other happy birthday anymore. We pretty much say all of our well wishes with one emoticon. In a day in age where hearing a voice over the phone is rare take advantage. It could set you apart in many ways and give you a competitive edge.

    ralph

    3. Tuck your elbows – it provides you with a checkpoint

    When you tuck your elbows into your body it gives you no room to drop your arms down any more. When your arms drop down your head will just end up following.

    ralph

    4. Get into the habit of simple and quick neck exercises

    Working on the deep neck flexors is an excellent way to create a stretch of your back neck muscles that tend to tighten up. It also builds the strength of the muscles deep in the front of the neck that tends to get weaker and inhibited because of always texting on your phone.

    1. Lie on your back
    2. Tuck your chin slightly
    3. Raise your head up just high enough to force you to contract the muscles in the front of your neck against gravity
    4. Slowly continue to raise your head into more neck flexion (chin down to to chest)
    5. Don’t let your chin jut forward
    6. Hold for 30 sec (or whatever time you can tolerate. Many of you will be super tired after 10secs)
    7. Repeat 3x daily